|
|
|


|
|
|
This topic provides information on the following requisition functions:
Using the Actions button from the Requisition window, you can link documents to a line item. Along with the links you create, TabWare automatically displays any links that exist for: (1) a mechanical integrity value shown on the PO Defaults window, and (2) a permanent inventory item.
To Establish a Document Link:
|
1. |
From the Requisition window, select a line item. |
|
2. |
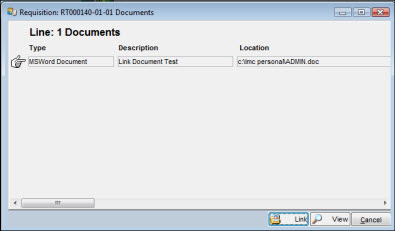
Click the Actions button and select Documents from the dropdown list. The documents window appears showing the list of existing links. |
|
3. |
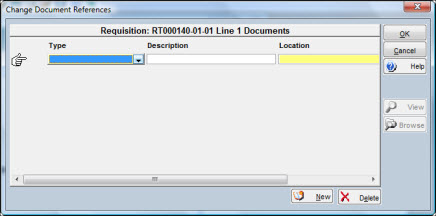
Click the Links button. The Change Document References window appears.
|
|
4. |
Click Type to see a dropdown list. The types of files available are Adobe PDF, HTML, HTTP, MSExcel and MSWord. |
|
5. |
Enter a description in the Description field. |
|
6. |
Click the Browse button, locate and select the document. |
|
7. |
Click OK to add the reference to the database. |
When you complete a requisition and click OK, TabWare saves the records to the database. When this occurs, the Requisition window closes. However, during the course of creating a requisition, especially a large one, you have the option of saving records without closing the window. From the Actions button, select Save Now from the dropdown menu. TabWare saves the records and lets you continue with data entry.
From the Requisitions window, you can delete a line item by clicking the Actions button and selecting Delete Line from the dropdown menu. You cannot delete a line under the following conditions:
If the item is for outside purchase and has been approved or has been transferred to a purchase order.
If inventory issues have occurred.
If the item has been used on a shipping order and that shipping order is still in existence.
If the Quantity Issued minus the Quantity Returned is not equal to 0 (zero).
Note: A user with limited security access cannot delete a line from a requisition created by a user who has full access.
From the Requisition window, you can delete an entire requisition if the Type is Charge to Account. The restrictions described for deleting a line also apply to deleting an entire requisition. You cannot delete the requisition if any one of the restrictions applies to any line item on the requisition.
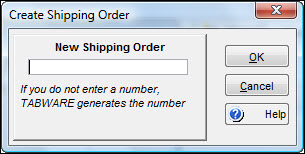
If any items on your requisition need to leave the plant, you can create a shipping order from the Requisition window. Click the Actions button and select Create Shipping Order. Enter a number for the shipping or click OK to let TabWare create the number.
For more information, see Processing Shipping Orders.
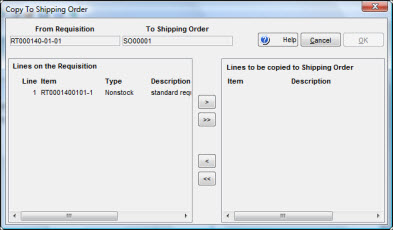
To copy all lines to the shipping order, click the double arrow button. All items appear on the right side of the window, ready to be copied to the new shipping order. To copy a single line to the shipping order, highlight the line to be copied and click the single arrow. When the required lines have been copied to the right side of the window, click OK to copy them to the shipping order.
Using the Requisition Search window, you can process requisition items through the review and approval process, including actions for review, view requirements, reject, approve, and cancel approval. There are buttons at the bottom of the search window for review and approval. Use the Go To button to select the other options. The Review button becomes available if you are an authorized reviewer designated in the Resources module. The other options become available to you if you are an authorized approver.
If Multiple Warehousing is On, you must have security access to the requisition line's stores location before you can review, reject, approve, or cancel approval for a requisition line. When you attempt to approve or review a requisition line for purchase, if other stores locations within your plant have a surplus of that item, including the stores location on the current requisition line, TabWare displays a warning message. This edit is performed if the Inventory item type setup option Skip Surplus Check During Requisition Entry and Approval is not checked. In addition, the Inventory item type setup option Perform Surplus Check if Item Unit Cost exceeds xxx (where xxx is the dollar limit that the item’s unit cost must exceed in order to receive the message), if checked, will perform the surplus check.
In the Resources module, the Approvals tab of the Employee Notebook has the Reorder option selected if the user has authority to approve reorder requisitions. A spending limit does not apply when users with this authority are approving reorders. The Approval Limit does apply when the same user is attempting to approve requisitions for non-reorder items.
Inventory items with an Order Method of Auto PO are exempt from the requisition approval process. Reorders for items of this type do not require approval.
If you are an authorized reviewer, you can use the Requisition Search window to review items and forward them to the next reviewer or the approver.
To Review Requisition Items:
|
1. |
From the Requisition Search window, select a query that displays the information you need. |
|
2. |
Select Approve Requisition from the Actions dropdown list under the Query field. |
|
3. |
Optionally, enter values for Requisition number and Item number. |
|
4. |
Click the Search button to show a list of records matching the selection criteria. |
|
5. |
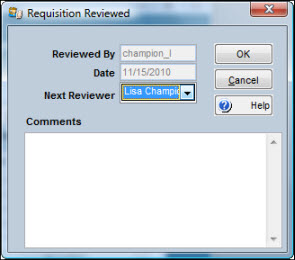
Highlight one or more records and click the Review button. The Requisition Reviewed window displays. |
Note: If Multiple Warehousing is On and the Inventory setup option Perform Surplus Check if Item Unit Cost exceeds NNN (where NNN is the dollar limit that the item’s unit cost must exceed), then the surplus edit will be performed. If other stores locations within your plant have a surplus of that item, including the stores location on the current requisition line, TabWare displays a warning message.
|
6. |
Enter a value for Next Reviewer. |
|
7. |
Optionally, enter Comments. |
|
8. |
Click OK. |
If you are an authorized approver, you can use the Requisition Search window to approve items for purchase.
To Approve Requisition Items:
|
1. |
From the Requisition Search window, select a query that displays the information you need. |
|
2. |
Select Approve Requisition from the Actions dropdown list under the Query field. |
|
3. |
Optionally, enter values for Requisition number and Item number. |
|
4. |
Click the Search button to show a list of items available for approval. |
|
5. |
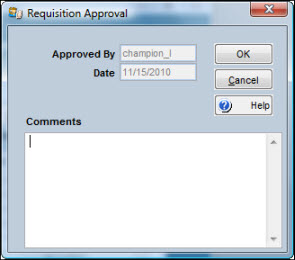
Highlight one or more records and click the Approve button. The Requisition Approval window displays. |
Note: If Inventory Setup Options has the option Requisition lines cannot be entered and approved by the same user selected, then an approver will not be allowed to approve any requisition line they entered.
Note: If Multiple Warehousing is On and the Inventory setup option Perform Surplus Check if Item Unit Cost exceeds NNN (where NNN is the dollar limit that the item’s unit cost must exceed), then the surplus edit will be performed. If other stores locations within your plant have a surplus of that item, including the stores location on the current requisition line, TabWare displays a warning message.
|
6. |
Optionally, enter Comments. |
|
7. |
Click OK. |
Authorized approvers can use this option to reject items, delaying or stopping the approval process.
To Reject Requisition Items:
|
1. |
From the Requisition Search window, select a query that displays the information you need. |
|
2. |
Select Approve Requisition from the Actions dropdown list under the Query field. |
|
3. |
Optionally, enter values for Requisition number and Item number. |
|
4. |
Click the Search button to show a list of records matching the selection criteria. |
|
5. |
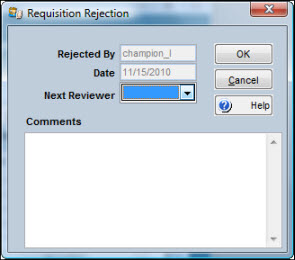
Highlight one or more records, click the Go To button, then select Reject from the dropdown list. The Requisition Rejection window displays. |
|
6. |
Enter a value for Next Reviewer. |
|
7. |
Enter Comments to explain the reasons for rejection. |
|
8. |
Click OK. |
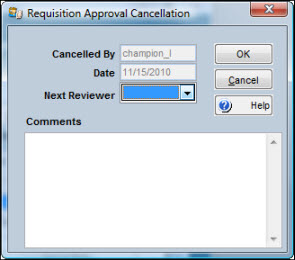
Approval of items can be cancelled using the Requisition Search window (this option is only available to users authorized as approvers).
To Cancel Approval of Requisition Items:
|
1. |
From the Requisition Search window, select a query that displays the information you need. |
|
2. |
Select Cancel Approval from the Actions dropdown list under the Query field. |
|
3. |
Optionally, enter values for Requisition number and Item number. |
|
4. |
Click the Search button to show a list of items previously approved. |
|
5. |
Highlight one or more records, click the Go To button, and select Cancel Approval from the dropdown list. The Requisition Approval Cancellation window displays. |
|
6. |
Enter a value for Next Reviewer. |
|
7. |
Enter Comments to explain the reasons for approval cancellation. |
|
8. |
Click OK. |
A setting in RFQ Setup Options determines if your site allows unapproved requisition lines to be transferred to a Request for Quote. If that option has not been turned on, you cannot cancel approval for a requisition line item if the item exists on an RFQ. The sole exception to this occurs when the item shown on the RFQ has been marked Do Not Award by the buyer.
If you select the View Requirements option from the Go To button on the Requisition Search window, you can view information regarding the work orders/requisitions that created the need to purchase.
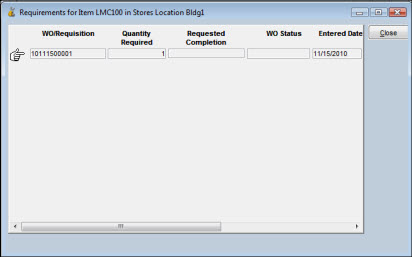
If your plant is using the Multiple Warehousing feature, you may have an alternative to placing a reorder. If the need for the items is immediate, you may decide to transfer items from other stores locations within the plant. The View Requirements window shows you the work order status, the requested completion date, the quantity required, the requested delivery date, and other pertinent information.
If you want to transfer material from another stores warehouse, click the Go To button and select Create Transfers for Item to determine the availability of the item.
If your plant is using the Multiple Warehousing feature, you have the option of satisfying a requirement for materials by transferring that material from another stores location on site rather than ordering from outside by using Create Transfers for Item or Move Items to Transfer Request.
The Create Transfers from Item option is available from the Go To button only if Multiple Warehousing is On. Select this option to view item availability in stores locations throughout the plant and build a transfer request. This option can be useful when used in conjunction with the View Requirements window, which allows you to determine the extent and time constraints of the requirements that generated the requisition. If you want to transfer materials from another storeroom, you can do so with this window.
![]()
Note: You cannot enter a Quantity Requested greater than the quantity shown as Available to Transfer.
To Create Transfers for an Item:
|
1. |
From the Requisition Search window, perform the search and highlight the requisition you need. |
|
2. |
Click Go To and select Create Transfer for Item. The Create Transfers to Stores Location window opens. |
|
3. |
Enter the quantity to transfer in the Qty Requested field. |
|
4. |
Select the Print Transfers Request checkbox to print the transfer request. When you click OK to generate the transfer request, the report is also sent to the printer. The report is printed at the default printer in the stores location from which the materials are to be transferred. |
|
5. |
Click OK. TabWare returns you to the Requisition Search window. |
|
6. |
The transfer request number appears in the micro-help area in the lower left corner of the screen. |
If the requisition was user-generated (as opposed to a reorder situation in which the system generated the requisition to return the inventory to the minimum On Hand requirements) and you were able to satisfy the requirements entirely, click Go To-Reject to stop the purchase of the item. If the requirements were only partially satisfied, double-click the requisition line to open the requisition and adjust the quantity requested.
If the requisition was system-generated, TabWare automatically reduces the quantity requested or deletes the reorder, depending on the results of the transfer.
If your location has multiple stores locations which are stocked from a central or main storeroom, you can use the Go To option Move Items to Transfer Request to re-stock the satellite stores locations with items out of the main stores location. Once these quantities have been designated as Due In to the satellite stores locations (satisfying the minimum On Hand requirements), TabWare automatically deletes the reorders placed for these stores locations. Then, if the transfer out causes quantities of that item in the source storeroom to fall below its designated level, TabWare creates a reorder requisition to replenish inventory in that stores location.
![]()
To Move Items to Transfer Request:
|
1. |
Using the Query Wizard, perform a search on reorders for the satellite stores locations. |
Note: TabWare uses a numbering method which numbers system-generated reorders with a prefix of RE and manual reorders with a prefix of MO. If your search criteria specifies Reorder, both types of reorders will be found by your query.
|
2. |
Highlight the desired items. |
|
3. |
Click Go To and select Move Items to Transfer Request. TabWare opens the Transfer Request window and copies the highlighted lines to it. |
|
4. |
Enter the From Location and the To Location. |
|
5. |
Click OK. |
|
6. |
The reorder procedure is executed for each of the item numbers for both the From Location and the To Location. If, according to the reorder formula, the item is below minimum in the From Location, then TabWare generates a reorder. Since the requirement in the To Location has now been satisfied, TabWare deletes the reorder for that location. |
Note: TabWare does not recognize a hierarchy of stores locations. All stores locations receive equal treatment. For example, processing for a stores location designated as main does not take precedence over any other stores location.
As you process requisition items through the Requisition Approval window, TabWare adds records to the Requisition Activity Log. The log serves as an audit trail for key events that occur for a requisition. The list of events includes review, approve, reject, and cancel approval.
To Update an Activity Log Record:
|
1. |
From the Requisition Search window, perform a search using the requisition number and item number as selection criteria. |
|
2. |
Double-click a record to open the Requisition window for the selected line item. The requisition number and item number appear in the title bar of the window. |
|
3. |
Click the Actions button and then select Log Activity from the dropdown list. The Log Activity window opens. |
|
4. |
Optionally, use the window’s vertical scroll bar to display the activity to be updated. |
|
5. |
Enter text in the Comments field. |
|
6. |
Click OK. |
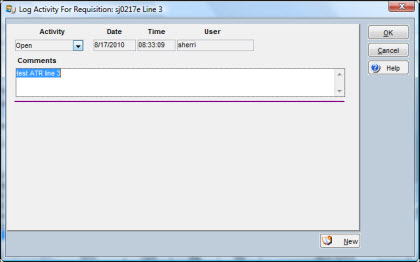
To Add Records to the Activity Log:
|
1. |
From the Requisition Search window, perform a search using the requisition number and item number as selection criteria. |
|
2. |
Double-click a record to open the Requisition window for the selected line item. The requisition number and item number appear in the title bar of the window. |
|
3. |
Click the Actions button and then select Activity Log from the dropdown list. The Activity Log window opens. |
|
4. |
Click the New button. A new record displays, showing the current date and time, along with your user id, in protected mode. The Planned Reviewer field is not visible. |
|
5. |
Select an activity from the dropdown list. |
|
6. |
Enter text in the Comments field. |
|
7. |
Click OK. |
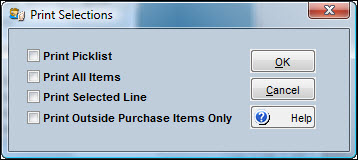
Header and line item information for a selected requisition can be printed from the Requisition Notebook or from selections made after performing a Requisition Search. The format and content of the printed output depends on the option chosen from the Print Selections window.
If you choose this option, TabWare prints a list of items in the standard picklist format. The items shown will be only those items available from internal storerooms. If the selected requisition has more than one delivery point and there is unsatisfied demand for at least one item, the Select Deliveries window appears. Select the deliveries you want included in the printing of picklists and then click OK. Optionally, use the Select All and Select None buttons to make your choices. If Multiple Warehousing is On, the picklist prints at the default printer in the stores location from which the material is requisitioned.
If you choose this option, you will receive a list of all items, shown in a special requisition format.
If you want to print information on certain lines only, select them and then select this option.
Print Outside Purchase Items Only
Select this option if you want to receive a list, shown in the special requisition format, but limited to only those items being purchased from an outside supplier.
To Print Requisition Information:
|
1. |
From the Requisition Search window, perform a search, select one or more entries from the displayed list, and then click Print from the Go To dropdown list, or click the Actions button from the Requisition window and then click Print from the dropdown list. |
|
2. |
Select a print option in the Print Selections window. |
|
3. |
Click OK. |
You have the option of adding an item from the Requisition Notebook to an Equipment Hierarchy. From the Item Information tab, click the Actions button and select Add/Drag to Hierarchy. If your requisition is against a work order and the work order has an equipment number, the Hierarchy window opens for the work order equipment number. If there is no associated equipment number (because the requisition is not against a work order or because the work order contains no equipment number), the Select Hierarchy popup window opens for entry of a hierarchy starting point. You can drag one item at a time from the requisition to the Hierarchy window.
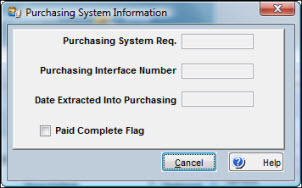
If your site uses the Purchasing Interface, you can view purchasing information from the Requisitions window. With an outside purchase item open, click the Actions button and then select Purchasing System Information.