|
|
|


|
|
|
Stores personnel use the Inventory Returns window when they receive materials in “like new” condition for stocking at assigned bin locations. The reasons for using the returns window are:
The material was issued through the inventory issues window, but was not used for its intended purpose.
The material was not originally issued from the storeroom; it may have been purchased by another entity, such as a capital project, then became surplus material to that project.
In the case where Repairables Tracking is being used, a repairable item was issued with the Core Return Expected checkbox mistakenly selected. The repair log generated at the time of the issue needs to be deleted, so the item is returned and then reissued with the option for a core return unchecked.
There are two windows for entering returns. The first one lets you decide where the credit should be applied. The second window lets you describe the items and the quantities returned.
To Return Inventory Items:
|
1. |
Perform a search from the Item Search window and select one or more items. |
|
2. |
Click the Go To button and select Returns from the dropdown menu. The first of two windows appears for selecting the Credit To option. |
|
3. |
Use the default setting (Account) or select Requisition. |
|
4. |
Enter other required entries and click OK. The second window displays. |
|
5. |
Enter information to describe the items returned. |
|
6. |
Optionally, enter a unit cost if the items were not issued originally from the storeroom. |
|
7. |
Click OK. |
Select this option from the first window if you are returning items previously processed through the Inventory Issues window and charged to an account, or use the returns window to place items in stock that were not originally issued from inventory.
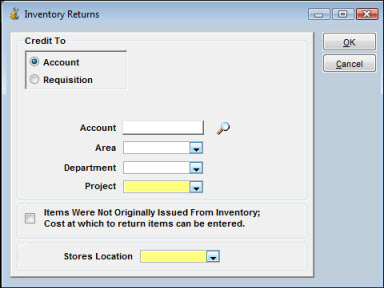
After you enter selections, click OK to display the second window.
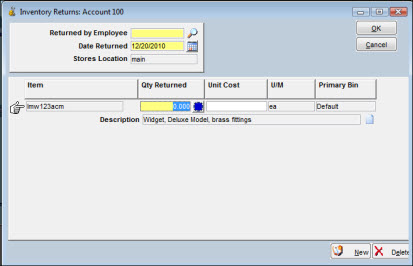
Click the Select Bin button in the Qty Returned column to return the materials to a secondary bin. If you do not designate another bin using this window, the quantity on hand in the primary bin will be increased in the amount of the issue.
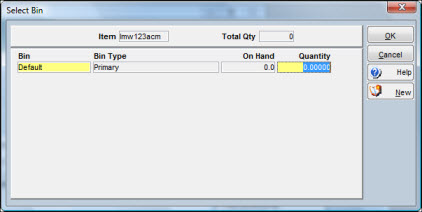
When returning materials to a bin, the Select Bin window contains a New button so you can create new bins if necessary.
Select this option from the first window when you are recording the return of items previously processed through the Inventory Issues window.
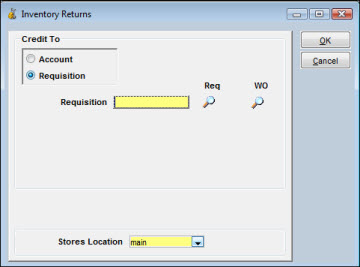
Keep in mind that TabWare automatically uses work order number as the requisition number. A work order in status 79 – Closed for Charges can be credited for items returned. There are two search icons. The icon under the Req heading provides access to requisition search. The other icon gives you access to work order search. When you enter a valid requisition number and click OK, the second window displays showing the items originally issued.
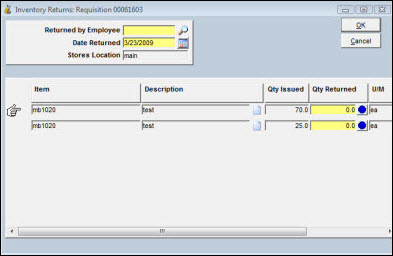
Quantities entered to the Quantity Returned column cannot exceed the quantity issued to-date.
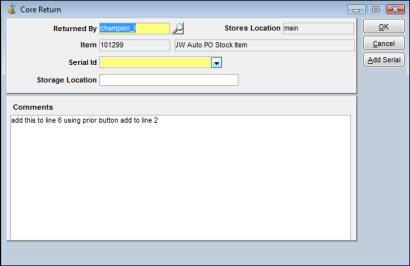
The Core Return window enables you to enter information about an item that has been marked as repairable and is returned for repair. You can access the Core Return window from the Repair Log window.
To Return an Item for Repair:
|
1. |
From the TabWare Power Panel, select Inventory. |
|
2. |
From the Item Search window, click the Go To button and select Repair Log Search. |
|
3. |
From the Repair Log window, perform a search and highlight the line that contains the information on the equipment location and item with which you need to work. |
|
4. |
Click the Return for Repair button from the Repair Log window. The Core Return window opens. |
|
5. |
The Returned By field defaults to the user ID of the person logged on, but you can modify this if necessary. |
|
6. |
If the item is flagged as serialized in the item notebook, TabWare requires that the serial number of the item be indicated. If the correct serial number does not default into this field from the Repair Log, click the dropdown arrow to search for a valid serial number. |
|
7. |
Enter any comments in the Comments field. |
|
8. |
Click OK. |
Note: The actions in step 6 are not available if the item is not marked as serialized.