|
|
|


|
|
|
When materials have been withdrawn from stores, an attendant uses the Inventory Issues windows to record the transactions. The process takes less time if requesters have preplanned, creating requisitions for their needs. The cost of materials issued can be charged to an account, to a requisition/work order, or to a stores request. The issues process uses two windows.
The first window lets you enter an account, requisition/work order number, or a stores request. If you are using Multiple Warehousing, you must also indicate the stores location from which the material is being issued.
The second window lets you record the items and quantities issued.
To enter an inventory issue, click the Go To button on the Item Search window and select Issue. The Inventory Issues window displays. Select the Account radio button if you are issuing materials not preplanned on a requisition and not chargeable to a work order.
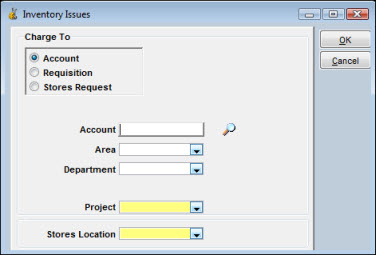
After selecting and entering values for Account, Area, Department, Project, and Stores Location (if applicable), click OK.
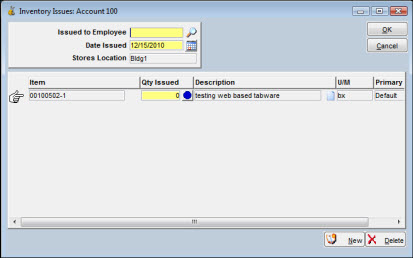
The second window displays for entry of line items.
To Enter Line Items:
|
1. |
Enter a value for the Issued to Employee field. Click the search icon to perform a search, if needed. |
|
2. |
After entering an item number and pressing the TAB key, the description, unit of measure, and bin location are displayed. |
|
3. |
Optionally, click the Select Bin icon to the right of the Qty Issued field to issue the item from a bin other than the primary bin. |
|
4. |
Enter a Quantity Issued. |
|
5. |
Optionally, click the comment icon to enter a comment. |
|
6. |
Click the New button to add another item or click OK. |
Click the Select Bin icon ( ) to issue the materials from a secondary bin. If you
do not designate another bin using this window, the quantity on hand in
the primary bin will be reduced by the amount of the issue.
) to issue the materials from a secondary bin. If you
do not designate another bin using this window, the quantity on hand in
the primary bin will be reduced by the amount of the issue.
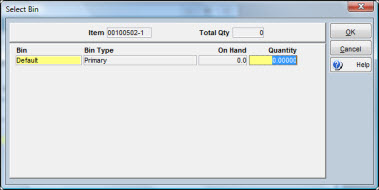
The Total Quantity indicates the quantity to be issued. You enter the quantity to issue from the bins shown in the Quantity column, not to exceed the quantity On Hand in the individual bin.
From the Inventory Issues window, select the Requisition radio button if you are issuing preplanned materials or issuing unplanned materials chargeable to a work order.
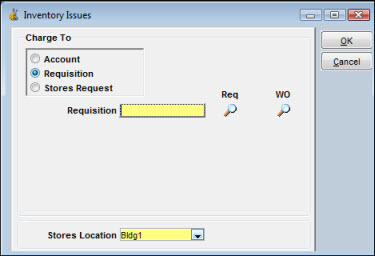
If you are issuing materials to a work order, keep in mind that TabWare uses the work order number as the requisition number. Click the search icon under the label Req to access the Requisition Search popup window. Click the icon under the label WO to access the Work Order Search popup window. Enter a requisition/work order number and click OK.
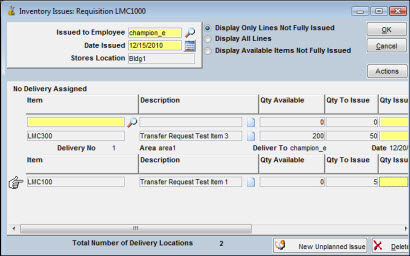
The second window displays showing preplanned items sorted by each delivery point on the requisition. Click one of the radio buttons at the top to adjust the search results display as needed. At the bottom of the window, TabWare shows the total number of delivery locations. To issue planned materials, enter Quantity Issued and click OK. To issue unplanned materials, click the New Unplanned Issue button and enter an item number and quantity issued. Click OK after entering the last unplanned item.
Click the Actions button to clear the quantity issued, filter items, or select a specific bin.
If you are issuing against a requisition, the Clear Quantity Issued button is available to clear all of the Quantity Issued fields. Since TabWare defaults the Quantity Issued from the quantity specified on the requisition, this button can be useful if you only need to receive one item out of several that appear on this screen. After all the quantities have been cleared, you can scroll to the item that needs to be issued and enter that quantity without having to manually enter an override value in the Quantity Issued column for all the other rows that are not being issued at this time.
You have the option of having TabWare display only the lines from the requisition that have not been fully issued. This selection includes both items that are currently available to be issued and those that are not currently available for issue. You can also have TabWare display all lines, or you can choose to have TabWare display only items that are not fully issued but are currently available for issue (this is the most restrictive list).
You cannot issue to a work order if any of the following conditions apply:
The work order that has a status of 79 - Closed for Charges.
The work order has been canceled.
Your site uses the Work Order Approval feature, the work order being processed has not been approved, and the system administrator has set up the system to disallow charges to unapproved work orders.
When you are issuing materials to a requisition written against account numbers (as opposed to a work order), the second window displays showing preplanned items. Enter the quantity issued and click OK. Neither the New Unplanned Issue button nor the Delete button is available. To issue unplanned items against accounts, you must click the Account button on the first window.
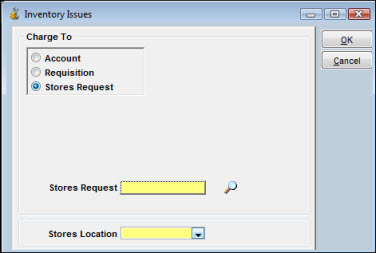
From the Inventory Issues window, select the Stores Request radio button if you are issuing items to a Stores Request. Either enter the Stores Request number or click the search icon to the right of the field to search for the number. If applicable, enter the stores location.
When you click OK, the Inventory Issues Stores Request window opens, listing all items for the indicated stores location that are not yet fully issued. Enter the appropriate amounts in the Qty Being Issued fields for each item being issued. To enter comments for a line item, click the Comments icon to the right of the field.
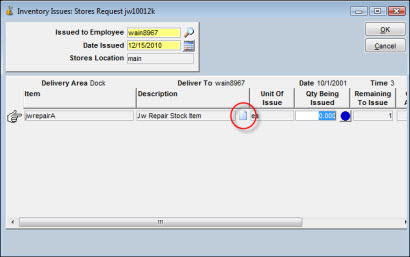
Click OK when finished.
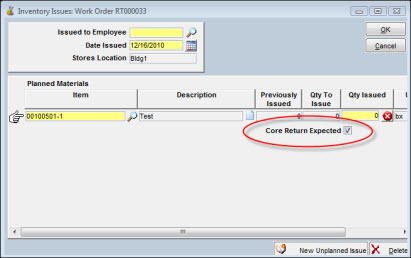
When Repairables Tracking is being used and an item issued from the stores location:
replaces an installed item that needs repair,
is charged to a work order, and
has been marked as Repairable in the Item Notebook,
the Inventory Issues window displays a checkbox marked Core Return Expected for that line item. If that checkbox is selected, TabWare creates a repair log record at the time of the issue transaction when the stores clerk enters the requisition, the quantity to issue, and the employee to whom the item was issued.
If the repairable item is also marked as serialized on the Item Notebook, a window opens for you to enter the serial number of the item that is being issued for replacement.
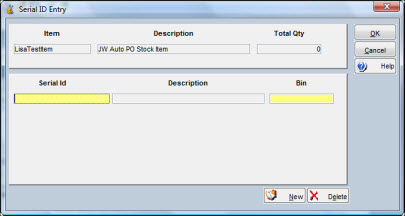
Click the dropdown arrow under the heading Serial ID and select the serial number that is to be installed as a replacement. If more than one item is issued, TabWare creates a repair log record for each quantity issued.
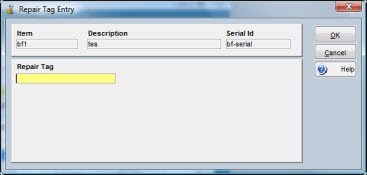
If your location is using repair tags, your system administrator has determined in Setup whether the tag number is created by the system or whether it must be entered manually.
When a broken item that has been marked repairable has been evaluated and determined to be a candidate for repair, TabWare provides a wizard to assist in tracking it through either an internal repair or an external repair.
To Issue an Item for Repair:
|
1. |
From the Repair Log Search window, highlight the row containing the item to be repaired and click the Issue for Repair button.
|
|
2. |
The Employee field defaults to the ID of the person logged on, but you can change this if necessary. |
|
3. |
Click the appropriate radio button to select whether the repair is to be done inside or whether it is to be sent outside. |
|
4. |
Add any comments that you feel are relevant and click the Next button. |
|
5. |
If you select Inside Repair and it is a serialized item, the wizard opens the Create Work Order window.
|
|
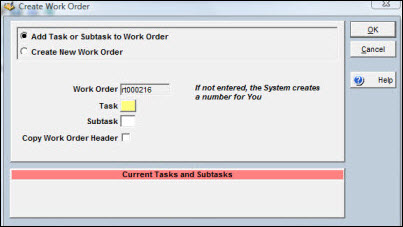
6. |
You can choose to either create a new work order or add to an existing work order as either a task or a subtask. Click the appropriate radio buttons and then click OK. |
|
7. |
The Work Order Notebook opens for you to enter any additional information. TabWare updates the Repair Status in the Repair Log to Being Repaired. |
|
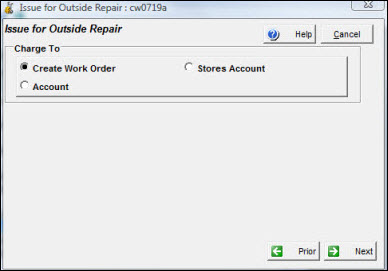
8. |
If you select Outside Repair and it is a serialized item, the wizard opens the Issue for Outside Repair window. Each of the Charge To options (Create Work Order, Account, and Stores Account) are secured options. If your userid does not have access to any of these options, you will not see them on this window. For non-serialized items, you are also given the option to Add to an Existing Work Order.
|