|
|
|


|
|
|
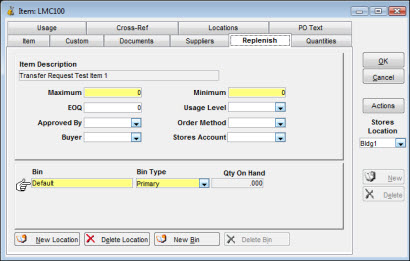
The information on the Replenish tab of the Item Notebook allows you to control how an item is reordered to ensure adequate availability for use. The basic controls include setting minimum and maximum quantities, selecting the order method to be used in calculating reorder quantities, and handling the resulting reorder. Other fields on the tab provide information to be communicated to Purchasing on the reorder.
The Replenish tab keeps information by stores locations. To select the stores location for which information is displayed (if you are using Multiple Warehousing), click the dropdown arrow labeled Stores Location on the far right of the window and select the location. Any user can view information, but if you need to update information on this tab, you must be given access through TabWare Security.
When specifying field settings on this tab, you should be aware of how they interact in creating reorders for Purchasing.
Note: Replenishment processing is dynamic within TabWare and is triggered whenever certain item balances change or when the minimum quantity changes on the Replenish tab of the Item Notebook.
Reorder calculations are NOT performed for items that have No Reorder entered in the order Method field. All other methods use the following reorder process.
To Perform a Reorder Calculation for an Item Replenishment:
|
1. |
Calculate a quantity for the item using the following formula: |
|
Quantity |
= |
Quantity on hand |
|
|
+ |
Unapproved quantity for purchase |
|
|
+ |
Approved quantity for purchase |
|
|
+ |
Quantity on Purchase Order |
|
|
+ |
Quantity in Receiving |
|
|
+ |
Quantity Due In |
|
|
+ |
Quantity Being Repaired |
|
|
+ |
Quantity Awaiting Repair |
|
|
+ |
Quantity Not Yet Returned for Repair |
|
|
- |
Quantity Due Out |
|
|
- |
Quantity Required |
Note: Quantity Due In and Quantity Due Out apply only if Multiple Warehousing is being used. Quantity Being Repaired, Quantity Awaiting Repair, and Quantity Not Yet Returned for Repair apply if the item is repairable and the Repairables Tracking option is being used.
|
2. |
If the resulting quantity is less than the value of Minimum Quantity on the Replenish tab, create a requisition line as follows: Calculate Quantity to order = maximum quantity - quantity calculated from step 1 above. |
TabWare maintains item quantities by bin and delivers three types of bins as base data. These bin types are primary, secondary, and Secondary-No Quantity. Items must be assigned at least one bin number and only one bin can be specified as Primary. You can have additional Secondary or Secondary-No Quantity bins. If you want TabWare to maintain quantities in the secondary bins, designate them as Secondary. If you want to store a list of bins but not track quantities in them, designate them as Secondary-No Quantity.
Note: In instances where an item is not physically stocked or if, upon receipt, a bin type is not designated, TabWare assigns the label Default and marks it as Primary. If the item is assigned to a bin at the stores location, the bin assignment should be corrected to reflect the actual bin name and type.
If your site is using the Multiple Warehousing feature, the New Location and Delete Location buttons are visible. Use these buttons to begin stocking an item at another stores location or to discontinue stocking the item at the designated stores location.
To Add a New Location:
|
1. |
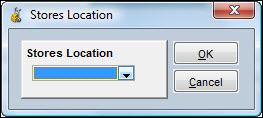
Click the New Location Button. The Stores Location popup window opens with a list of stores locations to which you have security access that do not currently stock the item.
|
|
2. |
Click the dropdown arrow to select the location you want to begin stocking the item. |
|
3. |
Click OK. TabWare displays bin information for the newly added location on the Replenish tab. |
|
4. |
Optionally, key over the Default bin name with the actual bin name. |
|
5. |
Optionally, enter the Quantity on Hand. |
Note: If serial tracking is turned on for the item, you will not be able to enter the quantity on hand.
To Discontinue Stocking an Item at a Stores Location:
|
1. |
Select the desired stores location in the Stores Location field. |
|
2. |
Click the Delete Location button. TabWare will not let you delete a location if any of the following conditions are present:
|
|
3. |
Click OK. |
Note: If you attempt to delete the only stores location in which the item is stocked, TabWare warns you that continuing will cause the item to be removed completely from the TabWare database.